Wednesday, January 29, 2014

January Gardening


The latest Arctic blast has 
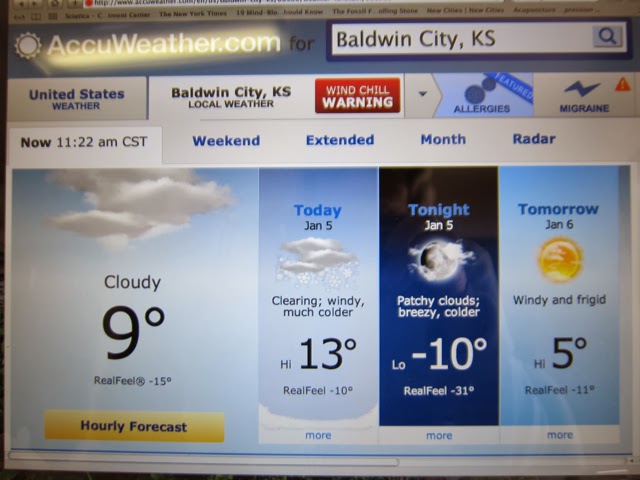
subsided and retreated as a south wind came up this afternoon. This morning’s 9º F temperature has risen to 45º F and the air feels almost balmy. It’s a fool’s paradise and bound to end soon, but for today, I had the itch to garden. Certainly one can’t dig in the garden and plant seeds yet. We still aren’t finished with January, for Pete’s sake.

Instead, I sorted through our seed collection that I keep in a plastic box in the basement. I was looking for seeds that I will start indoors in a few weeks. I found a bit of paper towel with twenty seeds dried onto it. The label says, “Abe Lincoln, 2008.” Oh, I love the Abe Lincoln tomato and plan to grow some this year. Will 6-year-old-home-saved seeds be viable? I decided to do a germination test. I picked off ten of the seeds and arranged them on a piece of wet paper towel. (Ten is a good number of seeds to test. It makes figuring the percentage of germination easy later on.)


I folded the towel in half to cover the seeds and put the towel in a plastic sandwich bag with a label.


I also started a germination test on some home-saved seeds labeled “Favorite Pepper.” No date. Then I found a packet of Chinese cabbage seeds with the sell by date of Dec. 2012. There are a jillion seeds in that package, so I started a test on them, too.


I put the bags on top of the refrigerator where it’s a bit warmer. The seeds, if viable, won’t germinate for a few days, but I’ll check them frequently. I especially hope the home-saved seeds will germinate. They are acclimated to Kansas’s summers and might succeed in the garden when plants from other states or regions wouldn’t.

So, there it is, my January gardening project. It gave my sagging winter spirits a lift to look forward to spring and gardening again.

Copyright 2014 by Shirley Domer

Monday, January 27, 2014

Old Sweater, How I Love You


Every person has one, I bet, except for those who live in the tropics and don’t wear much of anything. You know the sweater I mean. It’s the one with fuzz balls and the thin elbows. It may be the one with a couple of moth holes. It’s the one you reach for when the house feels chilly or you have to run outside to the mailbox on a winter’s afternoon. It doesn’t scratch and you don’t have to fold it nicely when you take it off. This sweater has gone many miles with you and you love it.

I clearly remember the day my old sweater and I got together. I was in a department store looking for a career suit and was on my way to the dressing room to try one on when I passed by a 50% off rack. My eye fell on this long, grey, size M, wool cardigan with pockets but no buttons. Without a moment’s consideration I grabbed it. It was love at first sight.


The sweater often went to work with me and became a work wardrobe mainstay. When I retired, my sweater retired with me and made a smooth transition to being a country-life sweater.

When the sweater began to look ratty I started looking for its replacement. Every similar cardigan I could find was flawed: big buttons, not wool, too dressy, too flashy, a collar, and often no pockets!

Now I’ve quit looking. No more the roving eye for me. I only have eyes for my old sweater. It’s at least 25 years old. We’re growing old together. I may even want to be buried in it.

Copyright 2014 by Shirley Domer

Friday, January 24, 2014

Perfection


Maybe being a Virgo made me a perfectionist of sorts. Certainly not in my housekeeping, but in creative projects I strive for perfection. If I bake a pie I want it to be both beautiful and delicious. If I sew a blouse, I want no loose threads and no mismatched or bulky seams.

Striving for perfection takes a lot more time than a slap-dash, make-do approach, especially if one becomes compulsive over tiny details. My first inkling that I had reached that point came one day when I was sewing while chatting with Nancy. I was trying to extract a miniscule bit of basting thread from a seam, even though it would never be noticed by anyone. I was tugging at it with tweezers when Nancy said, “Mother, what are you doing? Let it go!” So I did, and with it I began to let go of perfectionism.

This lesson was reinforced when my friend Kathy and I began getting together to sew. When one of us would discover a small mistake in our work, Kathy would say,  “Perfection is over rated.”

These two sensible women helped me see that sometimes striving for perfection is wasted time and sometimes it is worthwhile. What’s more, if a creative project is good in most respects, its flaws only show that it was made by a human being.

Yesterday’s bread, which is quite delicious, illustrates my point.


I hadn’t spent much time forming the loaf and the result is bipolar bread. Who cares? It’s actually amusing.

Today I made new terrycloth kitchen potholders. They will replace the threadbare ones I made ten or fifteen years ago. The new ones were looking so pretty I actually considered sewing on the bias binding by hand, which would have taken hours and been a struggle for arthritic hands. Then I remembered that these new potholders soon will be stained and scorched, just like the old ones. I sewed the binding on by machine instead.


I have just one more practical sewing project in mind, a curtain for the door to the garage. It won’t be perfect, but it will be good enough. When that is done, I’ll finish my latest Streets of Delft wall hanging. That is serious artful sewing and that’s where I will once again strive for perfection, even though I know it is not achievable.

Copyright 2014 by Shirley Domer

Wednesday, January 22, 2014

Bakeware Protection


A person has to protect her bakeware. I can’t remember how many 9”x9” pans I ruined by cutting cornbread with a sharp knife before I caught on and started using a table knife instead. Even the table knife tended to mar the inside surface of the pan.

Then one day I had a moment of lateral thinking and saw my bench scraper – a tool intended for use in kneading bread dough on a hard surface – in a new way.


Because I knead bread using a pastry cloth, I had used my bench scraper only for dividing bread dough, usually into two parts to make two loaves of bread. I used it as a cutter. Why not, I realized, use it to cut other things, such as a pan of brownies, a 9”x13” cake, or the aforementioned cornbread?

Instead of dragging a knife through the baked goods, I repeatedly use the bench scraper to cut straight down along the intended rows. I cut this cornbread into nine pieces.


Aren’t multiple-use tools great?

Oh, and when someone offers to cut the bar cookies for you, hand them the bench scraper. Never allow another person to do the cutting without your supervision! (Yes, I am a nut about baking.)

Copyright 2014 by Shirley Domer

Monday, January 20, 2014

Take That, Raccoons


Raccoon mating season is fast approaching. Because the old guy raccoons won’t let the young ones near the females the young ones burn with sexual frustration. That’s when the young guys form gangs and rampage through the countryside, looking for something to kill. They especially like to kill chickens and last year used their clever little fingers to tear shingles off the chicken house, trying to get inside to do their dastardly deeds.

Today Byron came to put an end to shingle destruction. He is applying cementitious siding all around the bottom of the chicken house. Cementitious siding is made of concrete and if raccoons can tear it off, I’ll eat my hat.


Copyright 2014 by Shirley Domer

Saturday, January 18, 2014

Still Sewing


I once thought of sewing as either garment construction or quilting, but lots of other useful things can be sewn, such as the pillow cover I made earlier this week. Today I made another useful object, a camera bag to wear hanging around my neck.

Actually I started a camera bag made from the leg of an old pair of jeans, but the fabric proved to be too bulky so I decided to start again with different fabric.

Several years ago I bought green canvas, intending to make new seats for director’s chairs, but Dennis had put the chairs in the trash because their wood was broken. I have enough green canvas to make about sixty camera bags, but today I used only eight inches of it.

First I made the strap, a 1¾ -inch strip, 39 inches long. I folded the edges in, folded the strip in half again, and sewed along the edge.


After measuring the camera’s girth and determining the necessary dimensions, I cut two rectangles 8"x4¾" and sewed them together on three sides. Then I double stitched the bottom and corners and trimmed the seams back nearly to the seam.


Next, I pressed the top seams apart and used a little fabric glue to hold them in place.


This made it easier to fold down the top of the bag after I had turned it right side out and to pin the strap ends in place.


Before sewing the top and straps down, I found a sock that had lost its mate to use as lining. I cut the sock off at the length of the bag and sewed a zigzag stitch along the cut edge.


I sewed around the top of the bag, securing the strap ends in place, and stuffed the sock lining inside the bag. A ruler was helpful in getting the lining in place.


Finally I sewed around the top of the bag again, catching the top edge of the sock. This step also made the strap more secure because it is now held in place by two rows of stitching.


Thinking I would take a photo of the camera inside the bag, I inserted the camera, and looked around for the camera to take the photo. What a dodo! Take my word for it, the camera fits perfectly with its wrist strap hanging outside for easy access.

Copyright 2014 by Shirley Domer

Friday, January 17, 2014

A Surprising Processed Food


I’ve been reading Real Food, by Nina Planck. Several things in this book have surprised me, but none more than the fact that table salt is a highly processed food. Yep, it is.

Planck says, “Typical commercial salt…is an industrial leftover.” After mining salt, the chemical industry heats it to extremely high temperatures to remove the valuable minerals from it. These minerals – some of them essential to human health – are sold separately to industries for a tidy sum. After harvesting the minerals, the leftover sodium chloride is supplemented with inorganic iodine, chemicals to prevent clumping, and dextrose. Then it is bleached. Finally it goes into a round package with a nifty little pour spout on top.

Who would have thought to look at the ingredients label on a box of salt? I knew that chefs recommend sea salt, but always assumed that was a culinary pretension. Now it's obvious to me that the chefs have read the label.

Unrefined sea salt, as opposed to processed salt, is rich in both essential minerals and trace minerals and contains less sodium chloride than processed salt. This mixture of minerals makes unrefined sea salt not only more healthful than processed salt but also more flavorful.

Unrefined sea salt may be grey, brown, yellow, or white. I’m especially fond of Himalayan sea salt, which is pink due to its iron content. It also contains magnesium, calcium and potassium, and as many as 64 trace minerals. It is only 85% sodium chloride.


Unrefined sea salt costs more than processed salt, it’s true. But it is a whole food, not an industrial leftover, and that makes it worth the price.

Copyright 2014 by Shirley Domer

Wednesday, January 15, 2014

I Think I've Got It!


About a month ago I succeeded in getting sourdough starter going in my kitchen. Capturing and cultivating wild organisms to ferment flour is a kind of farming in my mind. Whether I’m growing crops or raising livestock isn’t clear to me. All I know is that I take care of my starter organisms and they take care of me. We have a nifty symbiotic relationship going, feeding each other.

Once the starter got going I had to learn how to use it. Right away I was in trouble because sourdough bread is traditionally made of white flour and baked as a round loaf. I wanted to use whole wheat flour and make rectangular loaves of sourdough, so most recipes were irrelevant. A few home bakers are making whole wheat sourdough and several have posted their recipes on line. I’ve been trying various ones like Goldilocks, looking for the flour, starter, and water combination to produce the perfect 9-inch rectangular loaf of sourdough bread.

I made recipe after recipe, tinkering with ingredients and proportions. Some were too small, some were too hard, some were too messy, and none of them filled the bread pan just right. I’ve made so many loaves. I’ve given loaves away to friends and even shared some with Annie and the chickens. Finally, Ta-Da! I think I’ve worked it out, using a little bit of commercial yeast to boost the rise.


Whole wheat sourdough will never look like white sourdough, with its loft and big holes. That’s because white flour is pure starch while whole wheat flour contains not only the starch, but also the heavier grain elements, such as bran. Its rise produces only small holes and the loaf weighs a ton, but it has the characteristic sour taste of fermentation and a firm structure.

Whole Wheat Sourdough Bread

1 cup lukewarm water
½ teaspoon commercial yeast
2 tablespoons oil
1¼ cups of whole wheat sourdough starter
2 teaspoons salt
3 to 3½ cups of whole wheat flour or whole wheat bread flour

Starting in the late afternoon, pour the water into a large mixing bowl and sprinkle the yeast over it. When the yeast has dissolved, add the oil, salt, and starter. Stir to mix well, then add the flour, one cup at a time,. If 3½  cups of flour make a stiff dough, stop there. If not, add more flour up to another ½ cup. If you use an electric mixer with a dough hook to mix the dough, further kneading is not needed. If you mix the dough by hand, knead the dough for a few minutes and replace it in the mixing bowl.

Cover the bowl with a lid or plastic. Let the dough rise overnight. This bread is incredibly slow rise! The next morning, punch the dough down and form it into a loaf. Put the loaf in a buttered 9-inch bread pan, cover it with a dishtowel, and leave it to rise again.

When the dough is nicely rounded over the top of the pan, bake it in a preheated 375º oven for 40 minutes. Turn the loaf out of the pan onto a rack to cool. Try not to cut that first slice until the bread is just warm, not hot.

Copyright 2014 by Shirley Domer

Monday, January 13, 2014

More Sewing


Yesterday, inspired by nightgown sewing success, I was back at the sewing machine, constructing a cover for a little pillow acquired at the hospital when my shoulder joint was replaced last June. The little pillow is just the right size for the seat of my kitchen perch. I used a scrap of fabric left from making a baby bib years ago.


The first step was to construct ties to attach the pillow to my kitchen perch. I used bias strips 1¼-inches wide.


Next I sewed an envelope for the pillow, using two rectangles just a bit larger than the pillow.


Finally, I tucked in the unsewn edges, placing the ties, folded in half, at the ends of the seam.


Woops! In my enthusiasm I had neglected to observe the perch. The ties were not in the right place. Never mind. That’s why there are seam rippers. It took only five minutes to attach the ties in their proper places.


This sewing project took only a little over an hour, even counting my mistake. Now I wonder why I had procrastinated for so long. Lack of confidence, I suppose, but that’s behind me now. What next? That's a question to ponder while I rest my scrawny old frame on this cushy pillow.


Copyright 2013 by Shirley Domer

Saturday, January 11, 2014

Got 'Er Done!


Living with increasing disability has some interesting aspects. For example, when I undertake a task I haven’t done for a long time I never know whether my hands are still capable of doing it. All the joint replacements in my fingers have broken down, leaving my fingers attached to my hands only by skin and muscle. I can still use my fingers, but they are not strong and have a weak grasp.

That uncertainty showed up big time when I decided to make my granddaughter a flannel nightgown for Christmas. Cutting out the pieces was no problem, but I kept putting off the actual construction and didn’t get it done for the holiday. Fortunately she has a January birthday, and last week I knuckled down to construct the garment.

Although I’ve done a lot of machine construction of fabric wall hangings in recent years, I haven’t made a garment for ages. Several aspects of the process were challenging: picking up pins, making gathers, threading elastic through a tube, threading the sewing machine needle with fused wrists, grasping a needle for hand-sewing. But, by golly, I got ‘er done.


I even had fun adding my own touches to the pattern, such as a faux chenille collar.*


Now I want to sew more. A jacket for Zander. The wall hanging I started in May 2012 and set aside when I had wrist surgery. A cushion for my kitchen perch. I’m happy that sewing isn’t one of the pleasures I have to give up to rheumatoid arthritis.

*Faux chenille is made of layers of unhemmed strips of bias-cut fabric. When washed and dried, the layers curl up.

Copyright 2013 by Shirley Domer

Thursday, January 9, 2014

Giving up Plastic Wrap


During Low Impact week, back in November, I decided to give up single-use plastic. I’m not giving up plastic – who could, when more than 6,000 items of everyday use are made of it? I’d have to toss my hearing aids, toothbrush, coffee pot, and a host of other items I use daily. But use-once-and-throw-in-the-trash plastic is history at my house.

The first thing to go was plastic wrap. I always hated it anyway. Tearing off a piece of plastic wrap was always tricky and keeping it from sticking to itself was a struggle.

I’ve replaced plastic wrap with hoodie things from the beauty supply shop. I don’t know what they are meant for, but they make great bowl covers that can be washed and re-used many times. Here’s one that covers my mixer bowl.


I’ve written before about my plastic bag collection and how they can be washed and re-used again and again. A plastic bag can hold a bowl of leftovers or a dinner roll. Instead of using those irritating twisty things I used wooden clip clothes pins.


And, harking back to the days before plastic, I often cover a bowl of leftovers with a saucer or larger plate before setting it in the refrigerator.


I don’t miss plastic wrap one little bit. Good riddance, I say.

Copyright 2013 by Shirley Domer

Monday, January 6, 2014

In Praise of Humble Objects


I’ll bet I’m not the only one who is attached to certain familiar objects that have no monetary value whatsoever. These are little things that I handle frequently, useful things. I have warm feelings toward them and take pleasure in using them.

One such object was an old silver plated spoon I called the stirring spoon. I wrote about it in a post called “Stirring Spoon” (what else?) on May 1, 2011. Just taking that old spoon out of the drawer was like running into a friend at the grocery store. That spoon and I were pals. The stirring spoon disappeared a couple of years ago, but I still think about it and miss it.

Not all of my favorite objects are irreplaceable, though. Another of my object pals is my kneading cloth. It is a piece of heavy, unbleached canvas, 18” x 22”. One side of it – the kneading side – is imbued with flour. I knead the bread dough on this cloth twice, once after mixing the ingredients and again after the dough has risen in an oiled bowl. In the photo you can see rings of oil deposited when I turn the dough out for the second kneading and loaf shaping.


I made it myself from a length of canvas I bought at Sarah’s, our local fabric store. The fabric was 45 inches wide, so I cut it in half. When my current kneading cloth wears out, the other half of the canvas is waiting to take over.

I started using it without doing anything the secure the edges from raveling, but recently I had to run a row of zig-zag stitches around the fraying edges. With continued use the cotton has grown softer and more pliable. Just the touch of it gives me peace.


The great advantage of using my kneading cloth is that kneading isn’t messy. I can knead without touching the dough simply by lifting each corner of the cloth in turn, using the cloth to fold the dough over and over again. After the loaves are formed and in their pans, I use the cloth to cover them for the final rise.


Kneading cloths should be washed as seldom as possible. I wash mine only after making cinnamon rolls when inevitably some brown sugar and cinnamon soil the cloth. First I soak it in cold water to dissolve the imbued flour. Then I toss it in the laundry with a load of towels. After it dries I rub flour into the weave of the kneading side. I always fold it in thirds so that the center doesn’t wear out and I store it in a plastic bag in the utensil drawer.

I’ve had three kneading cloths and worn out two of them. Those were my favorites in a way because the canvas was printed with the words, “Property of the Federal Reserve Bank,” followed by a warning against using it for any purpose other than as a money bag. They’re gone now. It’s too late to toss me in prison.

Copyright 2013 by Shirley Domer

Sunday, January 5, 2014

Tomato Planting Time


Grant called yesterday. He was taking a break from planting seedling tomatoes in his garden. It was January 4. How can that be right? Well, the rascal lives in Tucson. He has built raised beds in his back yard and brought in good soil to fill them. He has a cold frame, too, and is eating arugula harvested from it.

Here’s the Tucson weather forecast:


Here’s the Baldwin weather forecast:


So, how do I feel about this? I’m happy for the kid and wish him well. If he’s able to produce tomatoes in Tucson, Arizona my hat’s off to him. I know a guy who has been trying to grow tomatoes in Phoenix for 30 years and hasn’t harvested one tomato. I’m curious about how Grant’s venture will work out. I admire him for trying. There’s nothing like a homegrown tomato.

I hadn’t given planting tomatoes a thought this year, but Grant’s venture has inspired me to look forward to our tomato-planting season. Maybe it’s time to go the basement and sort through my seed collection. Maybe I'll do some seed viability tests to determine which seeds to discard. Maybe I’ll pull out the seed catalogs that started showing up in the mail before Christmas this year. It isn’t too soon to select the vegetables I want to start indoors from seed.

These activities will keep me from thinking about tonight’s predicted record low of -10º F. Maybe. Or maybe I’ll book a flight to Tucson.

Copyright 2013 by Shirley Domer

Thursday, January 2, 2014

Everybody Loves Cornbread


Even the sophisticated palate can’t resist the down-home taste of cornbread. I’ve lost track of how many pans of cornbread I’ve made over the holidays. It goes with just about everything – chili, soup of any kind, greens and black-eyed peas, roasted pork, and a myriad of other foods. Cornbread doubles as dessert when eaten with honey, molasses, or – my favorite – cane syrup. My grandpa used to crumble a piece of leftover cornbread into a bowl, pour milk over it, and eat it with a spoon.


Southern cornbread is made with only cornmeal, no flour. Northern cornbread is made with half flour and half cornmeal. Being from two border states, Missouri and Kansas, I favor what I call Border Cornbread. It’s made with one-fourth flour and three-fourths cornmeal. Every variety of cornbread, though, is made with good old buttermilk. The best cornbread is made with stone ground, whole grain cornmeal, such as Hodgson Mill.

Border Cornbread

1 egg
1½ cups buttermilk
½ cup flour
½ teaspoon baking soda

1½ cups stone ground cornmeal
¼ cup oil
½ teaspoon salt
3 teaspoons baking powder

Preheat the oven to 450º.

Beat the egg, then whisk in the buttermilk, flour, and baking soda.

Before mixing in the remaining ingredients, put a generous teaspoonful of bacon fat or olive oil in an eight- or nine-inch pan and put the pan in the oven.

Now whisk the cornmeal, oil, salt, and baking powder into the batter.

Take the hot pan from the oven and pour in the cornbread batter. Give the pan a shake to distribute the batter. Bake for 25 minutes if using an eight-inch pan, 20 minutes if using a nine-inch pan.

For supper last night I made cornbread to go with a curried sweet potato and cauliflower soup. The cornbread's natural sweetness offset the curry's heat and its crunchy crust played counterpoint to the soft vegetables and broth. Delicious!

Copyright 2013 by Shirley Domer